THE CONTROVERSIES OF THE BATTLE
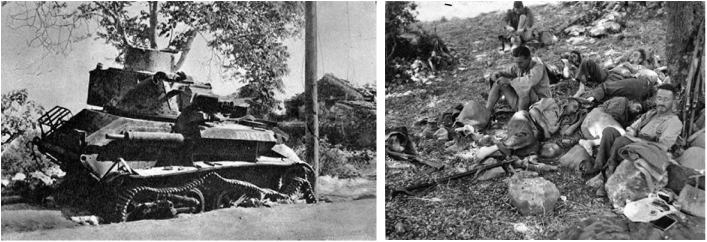 Left - Destroyed British Tank in Galatas, Right - Engineers Await Evacuation from Crete
Crete was a battle to be lost for the Allies, and that was exactly what happened. The failures by the entirety of the Allied force led to Crete being handed over to the Germans. The roles played by Sir Bernard Freyberg and many other high profile characters came into question throughout the battle, had has been constantly scrutinised by historians up until today. Communication, support and supplies were the three major failures in the Allied defence that ultimately consequent in the loss of Crete to the Germans. Historians have taken several different viewpoints on this matter, some believing that it was out of the Allies control, others believing the commanding officers should have been to blame, as seen in texts 23rd Battalion by Angus Ross, posing his thoughts, believing the controversies were Freyberg's doing, and How Crete was Lost, by Barrie Pitt, thinking the controversies were out of Freyberg's control.
The Allied defence of Crete was controversial to begin with. The mere lack of basic supplies including ammunition, food and water, some soldiers left with no clothes other than that on their body. After the retreat from Greece, many of the soldiers who were sent to Crete were requested to lay down their arms upon arrival to the island, weakening an already depleted force. This was featured in Ross' 23rd Battalion once again, talking of soldiers being asked to leave arms in Greece before their evacuation. From the beginning the Allies had known Crete was the next target for the Germans, after deciphering the Nazi code. In spite of this, the 'Creforce' had access to seven anti-aircraft (AA) guns to defend an island stretching 250km across the Mediterranean, all of which became redundant early of in the assault. The Royal Air Force (RAF) were also reluctant so step in, leaving the more than 600 Luftwaffe aircraft unopposed in their assault on Crete. Not only was air support lacking, but also armoured vehicles were a rarity in the battle. The two strongest Allied tanks (I-Tanks) fell in strange circumstances, one having an immobile turret, as described by Haddon Donald on his defence and counter attack at Maleme, the other one later being surrendered. The only use they served was intimidating the Germans on the counter-attack at Galatas. To add to this dilemma, several attempts to deliver ammunition and supplies to the Allied Headquarters ended up with the supply trucks going ablaze, as recounted by Bert Dyson of the 4th NZ Regiment on Crete.
Crete was a battle riddled with poor decisions, especially those made by Allied commanders. On several occasions, Allied defensive troops were prematurely evacuated from high value defensive areas, including Maleme airfield. A clear lack of organisation and communication was lacking, several times Allied forces unintentionally crossed paths, adding confusion to an already complicated affair. Freyberg received intelligence regarding the German movements and offensive strategies throughout the battle and in spite of all of this, removed forces from crucial areas when Germany had lost hope. The worst example of this was after the initial attempted raid on Maleme airfield had fallen through, Freyberg later pulled troops out from the airfield with full knowledge that the Germans knew Maleme was essentially a victory, as recognised in the History of the Second World War - How Crete was Lost, which also stressed Maleme as the "Key to Crete". This lack of communication and organisation was a common trend throughout the battle, and played a significant role in the loss of Crete.
After losing strategic strong-points to the Germans, Freyberg once again commanded the recapture of these objectives. Galatas and Maleme had initially been handed to the Germans when the Allies had prematurely retreated due to 'inadequate supplies' as mentioned in several historians perspectives, Freyberg fully aware of their significance to the battle. The recapture of both of these objectives was a wasted effort of both men and supplies, Galatas especially. The town was recaptured by the Allies within hours, just to have to vacate once again due to lack of supply. During this minor recapture, there were several Allied casualties alongside with a large amount of wasted ammunition which could have been more effectively used elsewhere, due to the rarity of good ammunition for the Allies.
After all the mishaps that had occurred during the main phase of the battle, the retreat from Crete was a shambles, poorly organised and a massive failure on the Allies part. To begin with, a large amount of the Allied force was unaware that there was an evacuation beginning, leaving a large Australian squad stuck on Crete, completely unaware that Crete had been lost. The Royal Navy also attempted to help out in the evacuation to Egypt, but later realised the amount of vessels they had sent to Crete were not suffice to carry all the forces on Crete back to Egypt. At this point, it became a matter of who was getting taken prisoner by the Germans, and who would be escaping with their life. This procedure took aboard the highest ranking and most severely wounded as priorities, leaving the lower ranks to be handed to the Germans. This left over 6,000 Allied soldiers stranded on the Southern Coast of Crete. Those who boarded vessels themselves were very lucky to escape with their lives, as the boats were in poor condition, many lives being lost to strafing German planes.
Image Sources -
http://www.nzhistory.net.nz/files/styles/fullsize/public/images/stories/crete/crete-018.jpg (Tank)
http://www.nzhistory.net.nz/files/styles/fullsize/public/images/stories/crete/crete-006.jpg (Engineers)
